YUM工具
yum基本概述
什么是yum
YUM,全称Yellow dog Updater, Modifier,是一个自由、开源的命令行软件包管理工具,运行在基于RPM包管理的的Linux操作系统(例如RedHat、CentOS、Suse等)。
基于 RPM 包管理,能够从指定的服务器自动下载 RPM 包并且安装,可以自动处理依赖性关系,并且一次安装所有依赖的软件包,无须繁琐地一次次下载、安装。
什么是yum源
包含各种rpm软件包的repository(软件仓库),这个软件仓库我们习惯称之为yum源或者是yum仓库,这个源可以是本地的也可以是网络的。
YUM源的配置
# 使用阿里云的yum源
http://mirrors.aliyun.com

# 系统中需要的基础yum源
base源:和镜像中的Linux基础rpm包差不多
epel源:一些扩展安装包

# yum源的配置文件存放目录
[root@localhost~]# ll /etc/yum.repos.d/
-rw-r--r--1 root root 1759 Jul  52021 CentOS-Base.repo
-rw-r--r--1 root root  664 Jul  52021 epel.repo

# 1.删除所有官方yum源
[root@zls ~]# rm -f /etc/yum.repos.d/*
# 1.2 安全方式,打包 不使用yum源
[root@zls ~]# gzip -r /etc/yum.repos.d

2.下载Base源
wget-O /etc/yum.repos.d/epel.repo http://mirrors.aliyun.com/repo/epel-7.repo

curl-o /etc/yum.repos.d/epel.repo http://mirrors.aliyun.com/repo/epel-7.repo
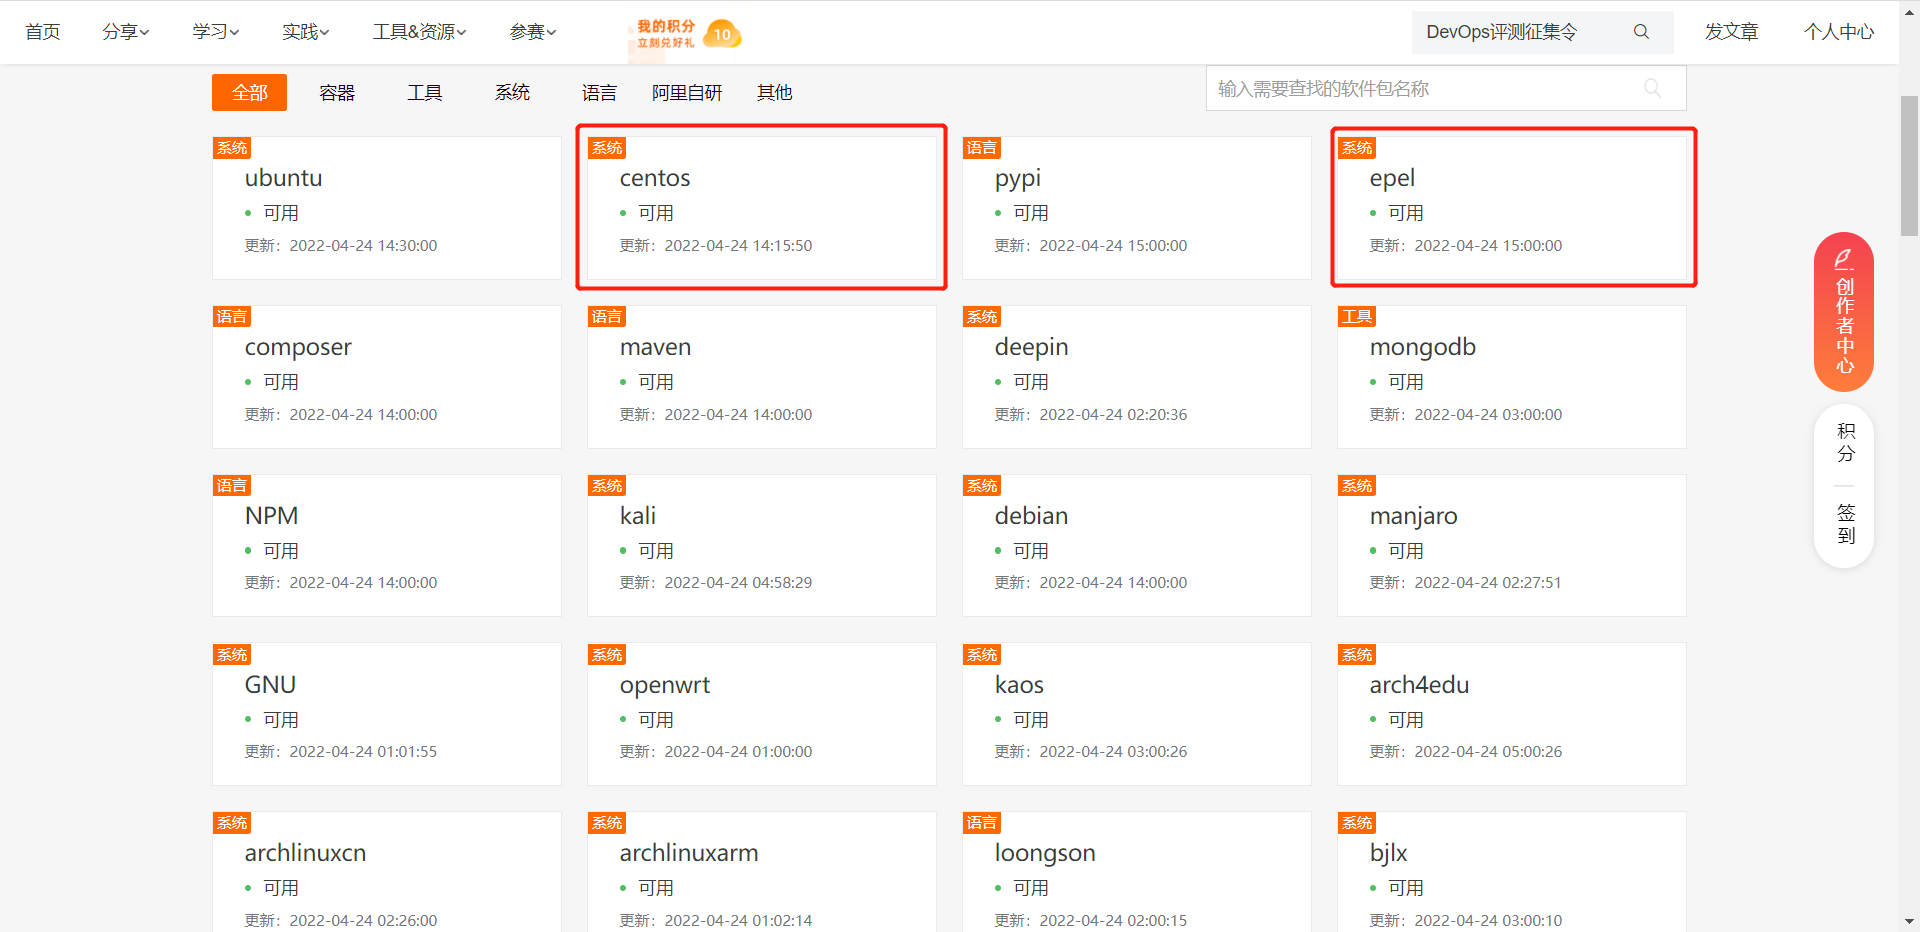
## 注意:在/etc/yum.repos.d/目录下所有的yum源配置,必须以.repo结尾- 打开对应yum源的镜像站:mirrors.aliyun.com
http://www.roweyy.com/wp-content/uploads/2022/06/2773634-20220424163933964-1663096567.png
- 下载两个yum源
- base源:所有系统的基础软件包
- epel源:扩展软件
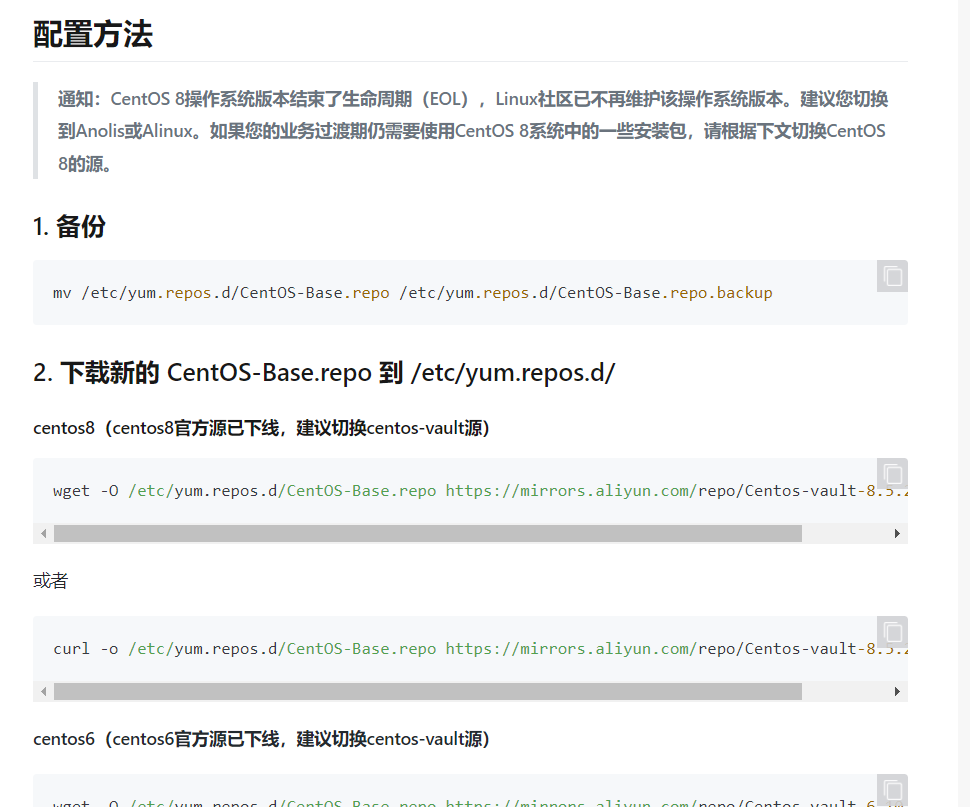
找到centos7复制命令
需下载wget命令才能使用
wget -O /etc/yum.repos.d/CentOS-Base.repo https://mirrors.aliyun.com/repo/Centos-7.repo

系统自带下载命令,无需下载
curl -o /etc/yum.repos.d/CentOS-Base.repo https://mirrors.aliyun.com/repo/Centos-7.repo
YUM包管理命令
使用yum查询软件包的方式
# 1.查询仓库中所有的rpm包
yum list
可以配合|grep过滤出想要的rpm包

# 2.查看仓库中所有安装包的详细信息
yum info
yum info tree (查看tree安装包的详细信息)

# 3.根据命令或文件查找该命令属于哪个rpm包
yum provides
命令注意:尽量接命令的绝对路径,不知道命令的绝对路径的情况下,*/命令
使用yum安装软件包的方式
yum安装方式:
  - 本地安装
    - yum localinstall -y 包名 (前提该包已经下载到服务器上了)
  - yum源安装
    - yum install -y 包名
  - 网站上安装
    - yum install -y 网站地址
 自动解决依赖关系的前提条件:在你的所有yum源中都要有该软件的依赖包
使用yum重装软件包的方式
#检查软件是否存在
[root@localhost~]# rpm -q vsftpd
vsftpd-2.2.2-24.el6.x86_64

#检查vsftpd软件配置文件
[root@localhost~]# rpm -qc vsftpd
/etc/logrotate.d/vsftpd
/etc/pam.d/vsftpd
/etc/vsftpd/ftpusers
/etc/vsftpd/user_list
/etc/vsftpd/vsftpd.conf

#不小心删除vsftpd配置文件
[root@localhost~]# rm -f /etc/vsftpd/vsftpd.conf

#重新安装软件
[root@localhost~]# yum reinstall vsftpd

作用:误删除了该服务相关的任何一个文件,使用reinstall都可以恢复,但是恢复的是最初始的配置。恢复的是被误删除的文件。

reinstall的方式,必须跟最开始安装这个包的方式保持一致。如果一开始是本地安装则重装也必须接路径本地安装。否则版本可能不一致 无法重装。
使用yum更新软件包的方式
# 查看当前系统中,有哪些软件是可以更新的
[root@localhost]# yum check-update

# 更新指定的软件包
[root@localhost]# yum update -y zlib

# 更新所有可更新的软件包
[root@zlocalhost]# yum update -y
很危险,可能会将系统内核进行更新。centOS7更新成8
使用yum删除软件包的方式
[root@localhost~]# yum erase samba -y
[root@localhost~]# yum remove samba -y
yum仓库相关指令
# 查看所有源中可用的yum仓库
仓库名                  仓库描述信息                            多少个包
repo id                 repo name                              status
base/7/x86_64        CentOS-7 - Base - mirrors.aliyun.com      10,072
# 查看所有源中,所有的yum仓库
[root@localhost]# yum repolist all

启用软件包:
[root@localhost~] # yum-config-manager --enable 包名
关闭软件包
[root@localhost~] # yum-config-manager --disable 包名
建议:修改yum源配置文件,开启或关闭仓库
yum缓存相关指令
## 清除所有的缓存
yum clean all

## 加载缓存
yum makecache

## 默认情况下,yum是不会下载rpm的只会安装
## 除非开启,下载的配置
vim/etc/yum.conf
[main]
cachedir=/var/cache/yum/$basearch/$releasever
keepcache=0
# 把0改成1就是开启下载rpm

## 下面是yum下载后的默认路径
ll /var/cache/yum/x86_64/7/

## 下载nginx,不安装,并指定目录
yum install nginx -y --downloadonly--downloaddir=/tmp

--downloadonly:仅下载,不安装
--downloaddir:指定下载的目录

## yum clean packages
只会清除默认路径下的rpm包,不会清除指定路径的包
yum包组相关指令
# 查看有哪些包组可以安装
[root@localhost]# yum group list
# 安装包组
yum groups install 包组名字
# 卸载包组
yum groups remove 包组名字
yum历史命令
#查看历史执行yum命令
[root@localhost~]# yum history

#查询历史执行yum命令ID详细信息
[root@localhost~]# yum history info ID

#撤销历史执行过的yum命令
[root@localhost~]# yum history undo ID
YUM全局配置文件
# 仓库名字
[base]
# 仓库的描述
name=CentOS-$releasever- Base - mirrors.aliyun.com
# 仓库的地址baseurl=http://mirrors.aliyun.com/centos/$releasever/os/$basearch/
# 仓库签名检查机制
gpgcheck=1
# 仓库开启/关闭(1:开启,0:关闭,默认1)
enabled=1
# 公钥的地址
gpgkey=http://mirrors.aliyun.com/centos/RPM-GPG-KEY-CenOS-7
自制YUM仓库
如果想要制作一个本地的YUM仓库,那么必须要先了解YUM的配置文件中的一些参数含义
YUM仓库配置文件
# 仓库名称
[base]

# 仓库描述
name=CentOS-$releasever- Base - mirrors.aliyun.com

# 仓库地址baseurl=http://mirrors.aliyun.com/centos/$releasever/os/$basearch/

# 检测签名机制(1:开启检测 0:关闭检测)
gpgcheck=1

# 签名机制秘钥地址gpgkey=http://mirrors.aliyun.com/centos/RPM-GPG-KEY-Cen
YUM仓库类型
搭建yum支持的的软件源主要有以下两种:
1.远程仓库
http://         端口一般是80
https://        端口一般是443
ftp://          端口一般是21

2.本地仓库
file://         没有端口(本地协议)
远程YUM仓库
先决条件:
- 创建仓库的命令
- createrepo
- 要有rpm包
- 网站获取
- 镜像获取
- yum源获取
- yum源的配置文件
1.安装创建仓库的命令
[root@localhost ~]# yum install -y createrepo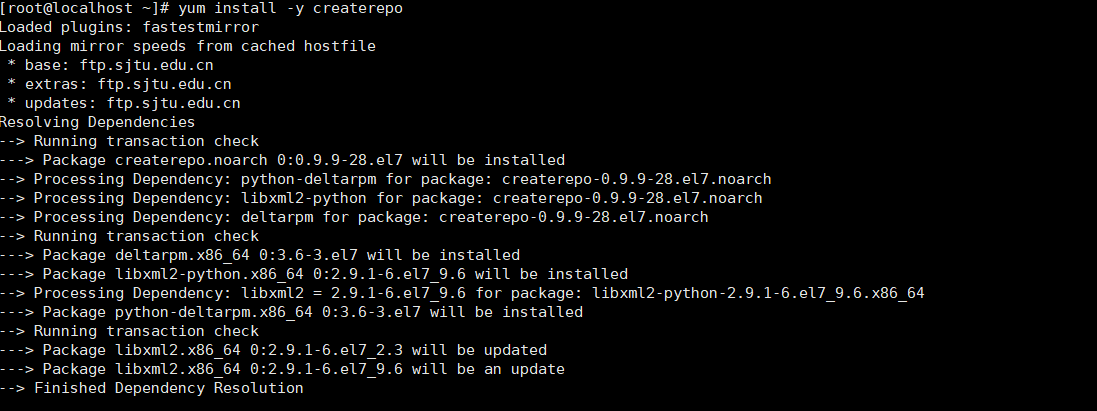
2.通过镜像,获取rpm包
- 挂载镜像[root@localhost ~]# mount /dev/cdrom /mnt

- 安装vsftpd服务
[root@localhost ~]# yum install -y vsftpd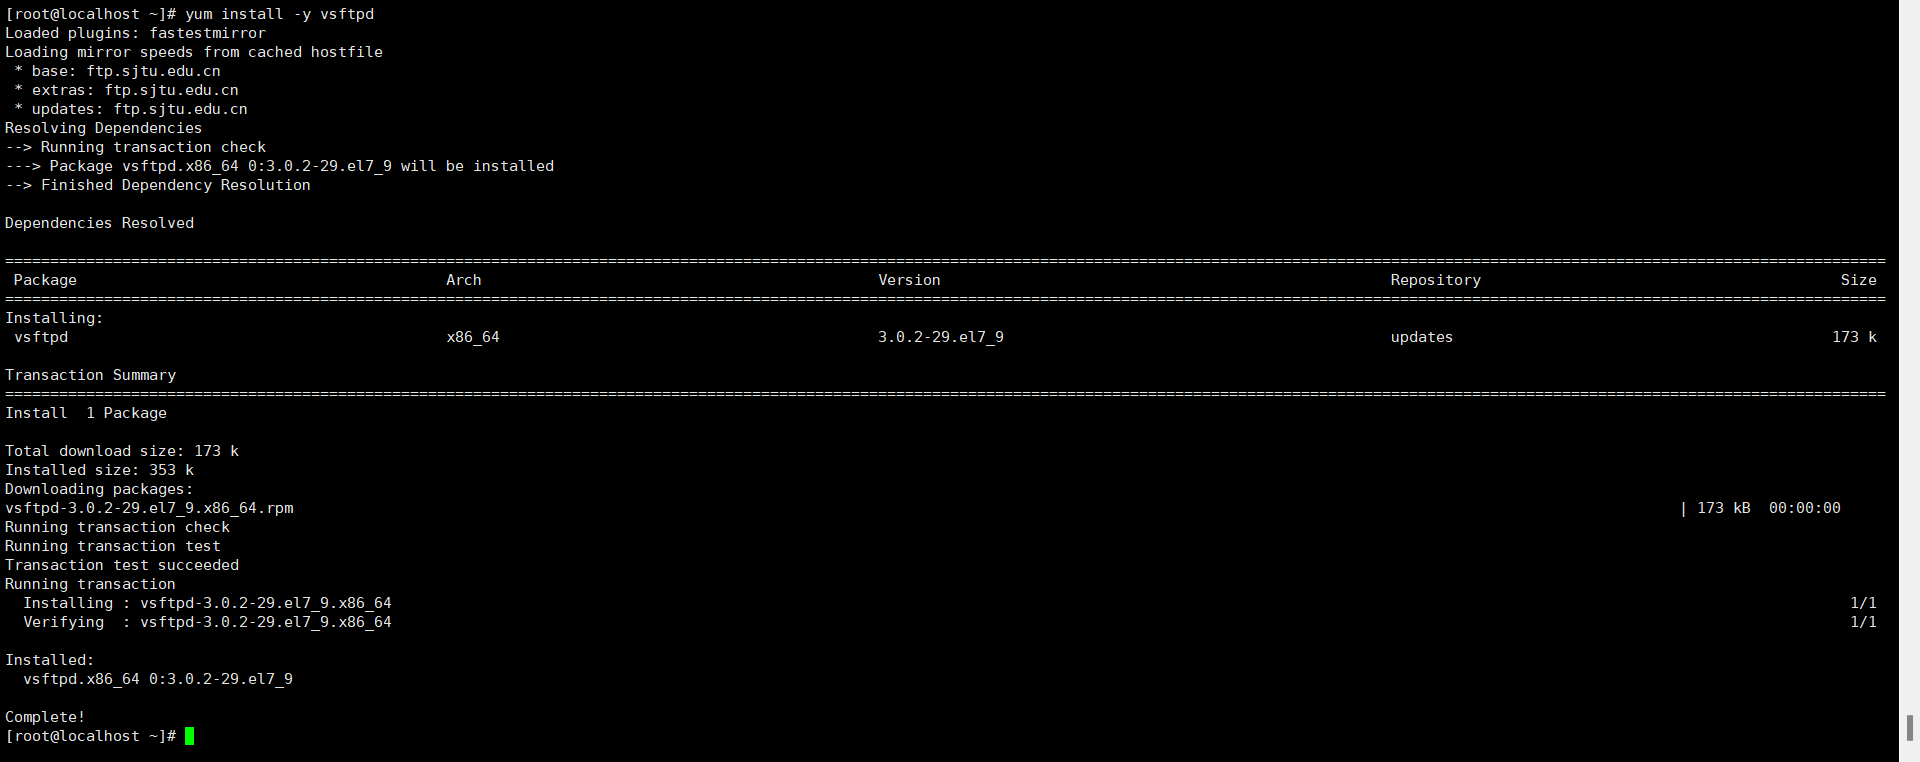
- 启动服务
[root@localhost ~]# systemctl start vsftpd

- 检查端口,如果没有netstat命令则需要安装
[root@localhost ~]# yum install -y net-tools

[root@localhost ~]# netstat -lntup

[root@localhost ~]# netstat -lntup|grep vsftpd
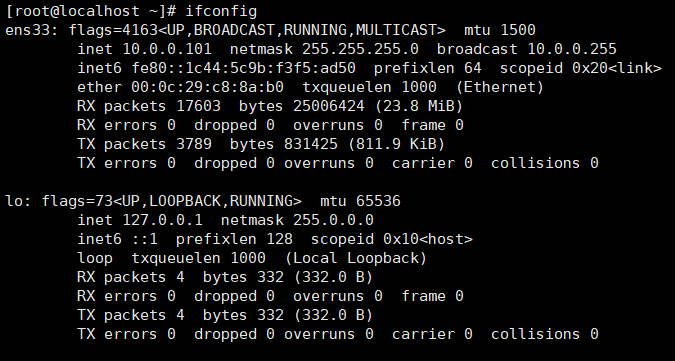
- 查询本机网络地址
[root@localhost ~]# ifconfig
-
打开浏览器访问:ftp://10.0.0.101/:21
-
访问失败的话关闭防火墙和selinux
[root@localhost ~]# systemctl stop firewalld
[root@localhost ~]# setenforce 0
- 创建仓库目录
[root@localhost ~]# mkdir /var/ftp/pub/{base,epel}

[root@localhost ~]# ll /var/ftp/pub/
drwxr-xr-x 2 root root 6 Apr 2511:13 based
rwxr-xr-x 2 root root 6 Apr 2511:13 epel
- 拷贝前2000个rpm包到base目录下
[root@localhost Packages]# ls |head -n 2000 |xargs -i cp -r {} /var/ftp/pub/base/
- 拷贝后2023个rpm包到epel目录下
[root@localhost Packages]# ls |tail -n 2023 |xargs -i cp -r {} /var/ftp/pub/epel/
- 将base和epel目录做成仓库
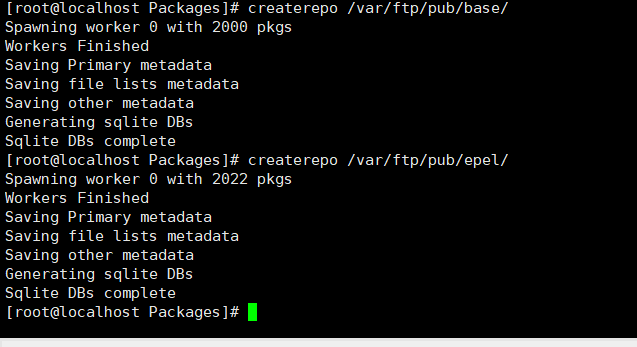
- 上网页查看仓库
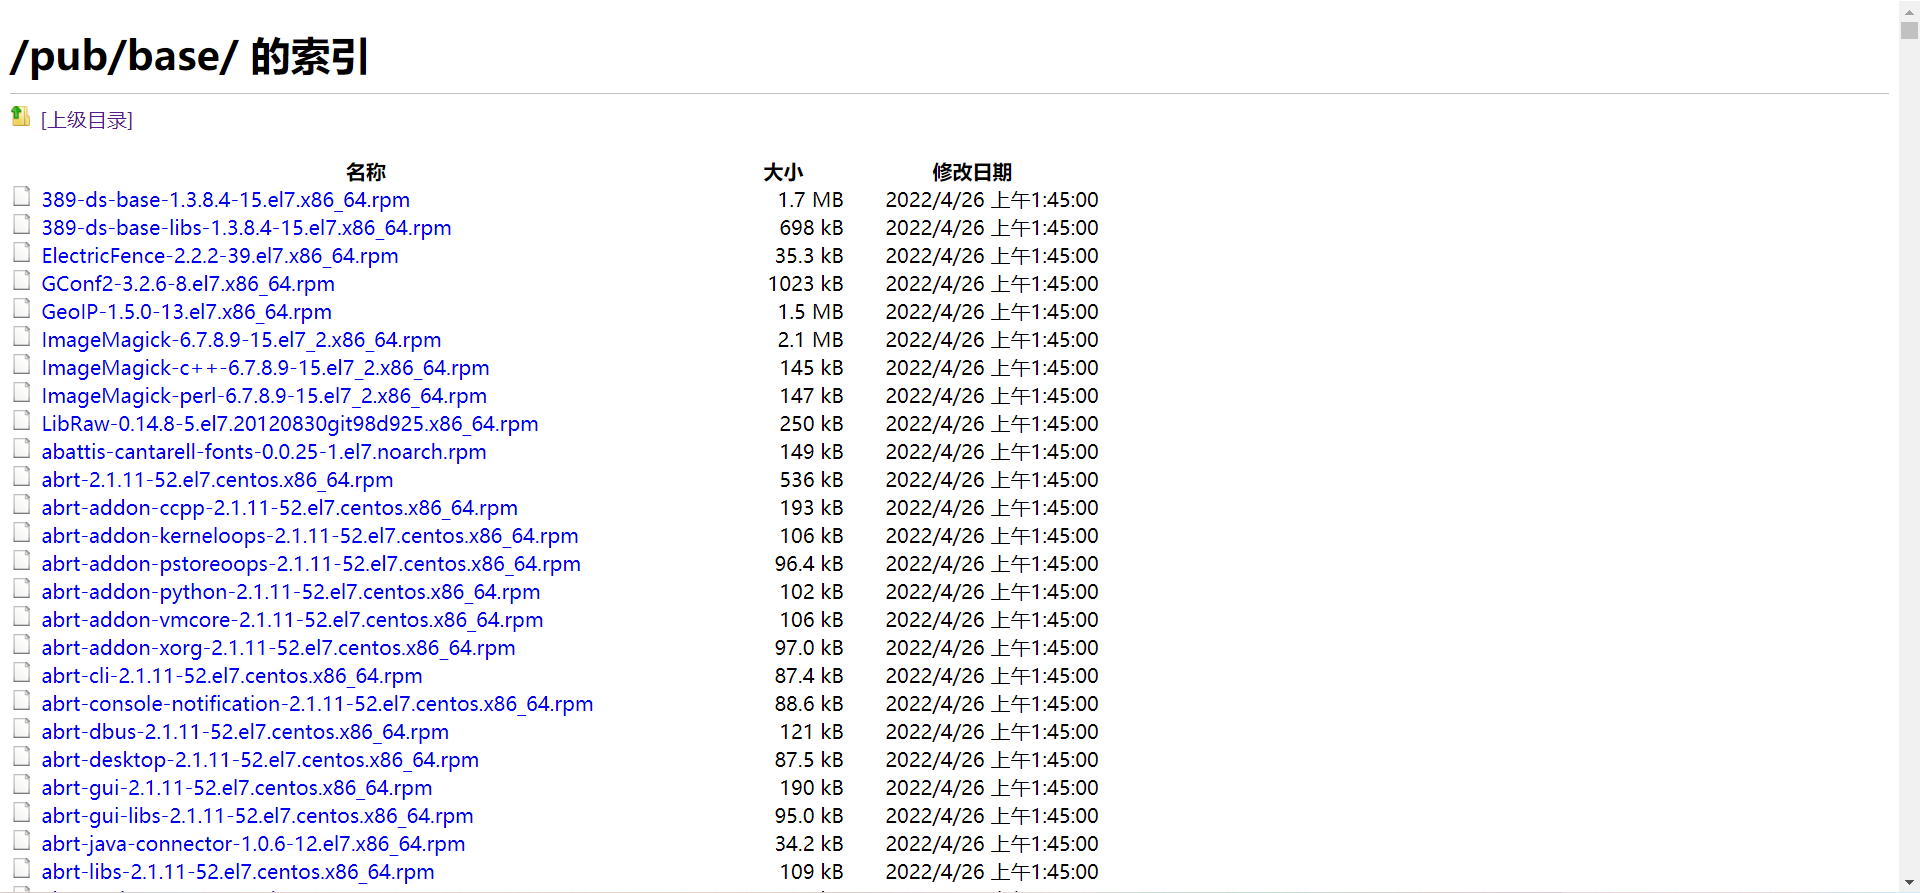
- 在其他终端上的repo配置文件写入base源的地址

3.1写入epe源的地址

3.2检查YUM仓库
3.3使用yum安装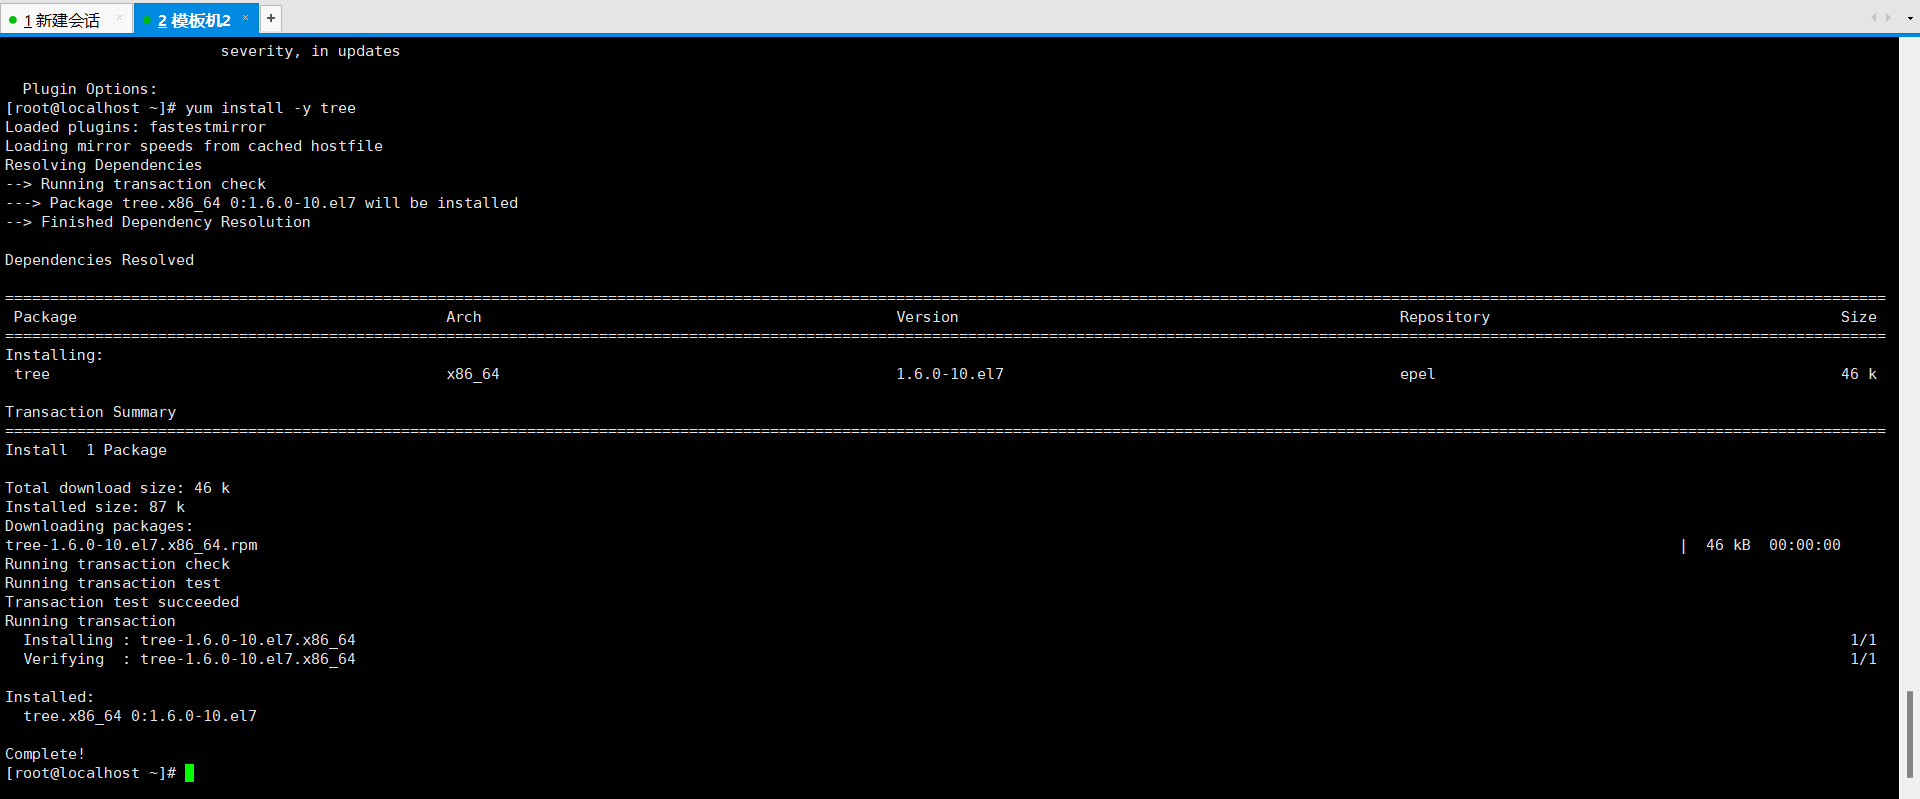
源码包安装
源码包的优缺点:
优点
- 可以自行修改代码供我们使用。二次开发
- 可以定制需要的相关功能
- 新版本优先更新源码
- 自动化规范,可以自定义安装路径
缺点
- 相对于yum安装,过程复杂繁琐
- 耗时较长
获取方式:
安装什么服务,就去什么服务的官方网站,下载源码包
例如: mysql nginx apache...
源码包安装步骤:
- 解压tar
- 生成/.configure cmake
- 编译make
- 安装make install
安装实例:nginx
1.上nginx官网,下载源码包:http://nginx.org
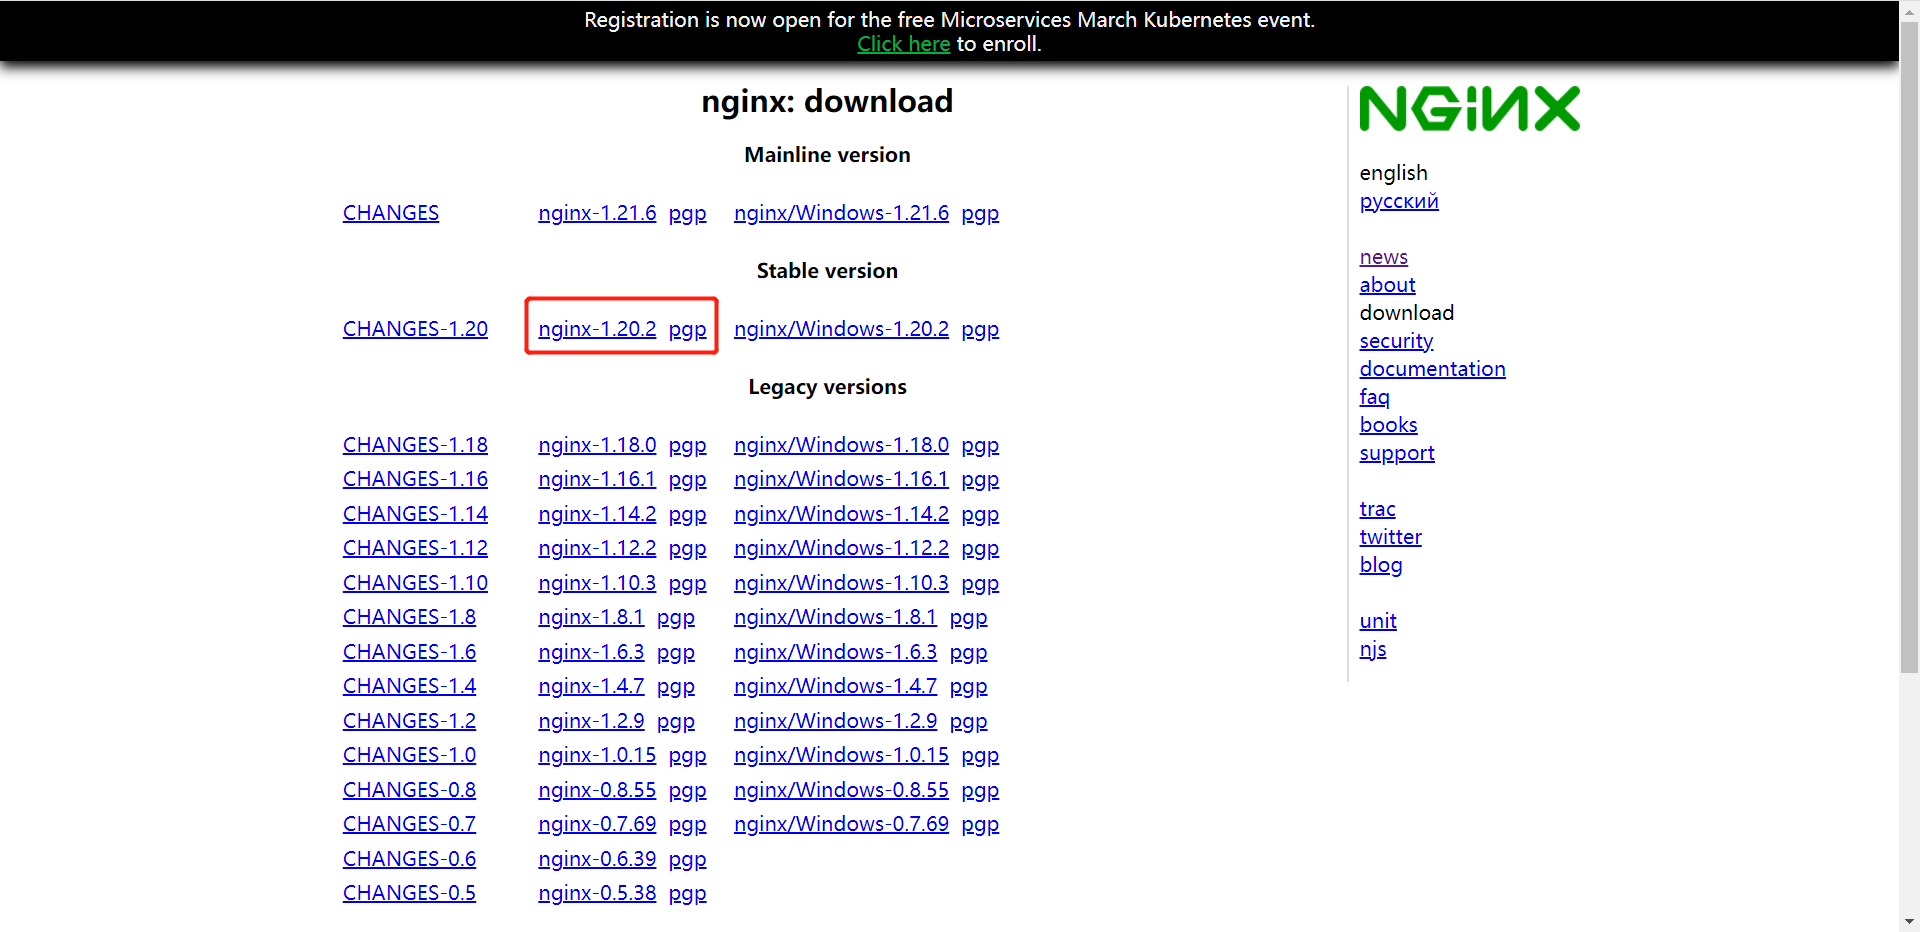
2.下载解压包
wget http://nginx.org/download/nginx-1.20.2.tar.gz3.解压源码包,并进入相应目录
[root@localhost ~]# tar xf nginx-1.20.2.tar.gz
[root@node1localhost ~]# cd nginx-1.12.2
4.生成
./configure(定制组件)

1.指定安装路径,例如 --prefix=/opt/nginx-1.12
2.启用或禁用某项功能, 例如 --enable-ssl
3.和其它软件关联,例如--with-pcre
4.检查安装环境,例如是否有编译器 gcc,是否满足软件的依赖需求
5.检测通过后生成Makefile文件

[root@localhost nginx-1.20.2]# ./configure --prefix=/opt/nginx-1.12.2 --user=nginx --group=nginx --with-http_ssl_module --with-http_stub_status_module
5.根据报错提示安装依赖包和基础环境
[root@localhost nginx-1.20.2]# yum install -y pcre-devel openssl-devel gcc gcc-c++ glibczlib-devel

# 报错一./configure: error: C compiler cc is not found
报错原因:缺少C语言环境
解决方法:yum install -ygcc gcc-c++ glibc

# 报错二 ./configure: error: the HTTP rewrite module requires the PCRE library.You can either disable the module by using --without-http_rewrite_moduleoption, or install the PCRE library into the system, or build the PCRE librarystatically from the source with nginx by using --with-pcre=<path> option.
报错原因:缺少pcre库文件
解决方法:yum install -y pcre-devel

# 报错三./configure: error: SSL modules require the OpenSSL library.You can either do not enable the modules, or install the OpenSSL libraryinto the system, or build the OpenSSL library statically from the sourcewith nginx by using --with-openssl=<path> option.
报错原因:缺少openssl库文件
解决方法:yum install -y openssl-deve
6.编译并安装
验证上一步命令是否成功, 非0d都不算成功
[root@node1 nginx-1.12.2]# echo $?
0

编译(让系统能识别你的代码,并且把刚才指定的功能和路径编译到源码中)
[root@localhost nginx-1.20.2]# make
[root@node1 nginx-1.12.2]# make install
7.做成软链接
[root@localhost nginx-1.20.2]# ln -s /opt/nginx-1.20.2/ /opt/nginx8.编写环境变量
如果安装时不是使用的默认路径,则必须要修改PATH环境变量,以能够识别此程序的二进制文件路径

1.添加nginx的环境变量,让nginx程序可以直接运行
[root@localhost opt]# vim /etc/profile.d/nginx.sh   exportPATH="$PATH:/opt/nginx/sbin"

2.加载环境变量
[root@localhost opt]# source /etc/profile
9.启动nginx并检查nginx是否启动成功(端口)
启动nginx
[root@localhost ~]# nginx

检查nginx是否启动成功(端口)
[root@localhost ~]# netstat -lntup|grep nginx

检查nginx进程
[root@localhost ~]# ps -ef|grep nginx
10.关闭防火墙和selinux
关闭防火墙
[root@localhost ~]# systemctl stop firewalld

关闭selinux
[root@localhost ~]# setenforce
nginx网页
# 站点目录
[root@localhost html]# pwd
/opt/nginx/html
# 代码文件
[root@localhost html]# vim index.html
定制rpm包
什么是定制rpm包
将原本使用源码安装的服务,打包成rpm包
为什么要定制rpm包
使用源码安装,步骤繁琐复杂浪费时间,把源码包打成rpm包安装时可以节省时间,提高工作效率。做好rpm包,可以将rpm包放入yum仓库中,方便安装。
安装依赖关系:
- rpm-build
- ruby
- fpm
fpm是使用ruby编写的,依赖安装ruby,fpm依赖rpm-build,否则定制包的时候会出现错误
[root@localhost ~]# yum -y install ruby rubygems ruby-devel

[root@localhost ~]#yum install -y rpm-buildGem是一个管理Ruby库和程序的标准包,它通过Ruby Gem(如 http://rubygems.org/ )源来查找、安装、升级和卸载软件包,非常的便捷。作用和yum差不多,是包管理工具。yum来管理.rpm的包,gem来管理.gem包
1.安装fpm
# 1.查看gem默认的源
[root@localhost ~]
# gem sources*** CURRENT SOURCES ***
https://rubygems.org/
(因为rubygems是外网源,下载速度较慢,因为我们可以换成国内源)

# 2.下载阿里云的base源和epel源
wget-O /etc/yum.repos.d/CentOS-Base.repo https://mirrors.aliyun.com/repo/Centos-7.repo
wget-O /etc/yum.repos.d/epel.repo http://mirrors.aliyun.com/repo/epel-7.repo

# 3.删除gem默认官方源
[root@localhost ~]# gem sources --remove https://rubygems.org/
https://rubygems.org/ removed from sources
[root@localhost ~]# gem sources
*** CURRENT SOURCES ***

# 4.添加阿里云的gem源
[root@localhost ~]# gem sources -a https://mirrors.aliyun.com/rubygems/
https://mirrors.aliyun.com/rubygems/ added to souces

# 5.安装fpm
[root@localhost ~]# gem install fpm -v 1.3.3

# 6.将安装好的fpm包进行解压至当前目录(也可以自行创建文件夹)
[root@localhost fpm]# tar xf fpm-1.3.3.x86_64.tar.gz

# 7.安装.gem类型的包至当前目录,安装失败可以重复安装至成功
[root@localhost fpm]# gem install *.gem
2.使用实例–实战定制nginx的RPM包
1.源码安装nginx
# 1.安装依赖
[root@localhost ~]# yum install -y gcc gcc-c++ glibc pcre-
devel openssl-devel

# 2.下载nginx源码包
[root@web01 ~]# wget http://nginx.org/download/nginx-1.20.2.tar.gz

# 3.解压
[root@web01 ~]# tar xf nginx-1.20.2.tar.gz

# 4.生成
[root@web01 nginx-1.20.2]# ./configure --prefix=/opt/nginx-1.20.2 --with-http_ssl_module --with-http_stub_status_module

# 5.编译和安装
[root@web01 nginx-1.20.2]# make && make install
FMP常用参数
-s          指定源类型
-t          指定目标类型,即想要制作为什么包
-n          指定包的名字
-v          指定包的版本号
-C          指定打包的相对路径  Change directory to here before searching forfiles
-d          指定依赖于哪些包
-f          第二次打包时目录下如果有同名安装包存在,则覆盖它
-p          输出的安装包的目录,不想放在当前目录下就需要指定
-m          打包的作者
--post-install      软件包安装完成之后所要运行的脚本;同--after-install
--pre-install       软件包安装完成之前所要运行的脚本;同--before-install
--post-uninstall    软件包卸载完成之后所要运行的脚本;同--after-remove
--pre-uninstall     软件包卸载完成之前所要运行的脚本;同--before-remove
2.编写软链接和环境变量脚本
## 安装完nginx之后
1.做软链接
2.添加nginx的环境变量

## 先写脚本
[root@localhost ~]# vim post_install_nginx.sh
ln-s /opt/nginx-1.20.2 /opt/nginx
echo'PATH="/usr/local/nginx/sbin:$PATH"' > /etc/profile.d/nginx.sh
3.fpm打包
#打包:
fpm -s dir -t rpm -n nginx -v 1.6.3 -d 'pcre-devel,openssl-devel' --post-install post_install_nginx.sh -f /opt/nginx-1.20.2

fpm -s dir    #类型
-t rpm        #制作成什么包
-n nginx      #指定包名
-v 1.6.3      #指定包的版本
-d 'pcre-devel,openssl-devel'      #指定包安装依赖
--post-installvim post_install_nginx.sh #安装后执行的脚本
-f /opt/nginx-1.20.2   #指定路径
使用其他机子测试
将本机的rpm包发送到10.0.0.102机子root目录下的nginx目录里
[root@localhost nginx]# rpm -ivh nginx-1.20.2-1.x86_64.rpm 在新机子上用rpm直接安装该包
error: Failed dependencies:
openssl-devel is needed by nginx-1.20.2-1.x86_64
pcre-devel is needed by nginx-1.20.2-1.x86_64
## 报错:提示需要openssl-devel和pcre-devel依赖包

[root@localhost nginx]# yum localinstall -y nginx-1.20.2-1.x86_64.rpm #使用
yum本地安装该包,会自动从源里下载包所需的依赖
Complete! #成功


Comments | NOTHING